Kubeapps on a TKG Management Cluster
This is part two of a series detailing the steps required to run Kubeapps on a VMware TKG management cluster (on AWS) configured to allow users to deploy applications to multiple workload clusters, using the new multicluster support in Kubeapps. Though details will differ, a similar configuration works on other non-TKG multicluster setups as well.
The first post described setting up your VMware TKG management cluster with two OpenIDConnect-enabled workload clusters. This post assumes you have your TKG environment setup as described there and focuses on the Kubeapps installation and configuration. The following video demos the result:
Prepare a Kubeapps configuration
We’ll need two random values for the client and cookie secret required as part of Kubeapps’ oauth2-proxy configuration, so generate these values with:
kubeappsClientSecret=$(openssl rand -base64 32) && echo $kubeappsClientSecret
kubeappsCookieSecret=$(openssl rand -base64 32) && echo $kubeappsCookieSecret
Next, create a kubeapps-tkg-values.yaml file with the following contents, substituting in the same values from earlier steps:
# Ensure that Kubeapps is reachable externally via the frontend svc as an ELB
# currently without TLS.
frontend:
  service:
    annotations:
      service.beta.kubernetes.io/aws-load-balancer-backend-protocol: http
    port: 80
    type: LoadBalancer

# Setup the oauth2-proxy running on the frontend to handle the OIDC authentication
# for us.
authProxy:
  enabled: true
  provider: oidc
  clientID: kubeapps-oauth2-proxy
  clientSecret: KUBEAPPS_CLIENT_SECRET
  cookieSecret: KUBEAPPS_COOKIE_SECRET
  additionalFlags:
    - --oidc-issuer-url=https://DEX_SVC_LB_HOSTNAME
    # IMPORTANT: We are overwriting the scope option to include the workload clusters' clientids in the audience.
    - --scope=openid email groups audience:server:client_id:my-oidc-cluster audience:server:client_id:second-oidc-cluster
    # TODO: Update to provide the dex ca via --provider-ca-file and mounting etc.
    - --ssl-insecure-skip-verify=true
    # Since Kubeapps is running without TLS, can't use secure cookies
    - --cookie-secure=false
    # If you need to access the actual token in the frontend for testing, uncomment the following.
    # - --set-authorization-header=true

# Configure the two workload clusters
clusters:
  - name: my-oidc-cluster
    apiServiceURL: https://DNS_OF_FIRST_WORKLOAD_CLUSTER_API_SERVER:6443
    certificateAuthorityData: CA_DATA_FOR_FIRST_WORKLOAD_CLUSTER_API_SERVER
  - name: second-oidc-cluster
    apiServiceURL: https://DNS_OF_SECOND_WORKLOAD_CLUSTER_API_SERVER:6443
    certificateAuthorityData: CA_DATA_FOR_SECOND_WORKLOAD_CLUSTER_API_SERVER
As noted in the comments there, the most important part for the authProxy is the --scope argument which requests not only the normal openid email groups scopes but also requests that the workload client ids be included in the audience of our kubeapps-oauth2-proxy token. More about this below.
For the apiServiceURL and certificateAuthorityData values for Kubeapps’ clusters configuration, you have this data all in your kubeconfig, so grab it from there:
less $KUBECONFIG
With the kube-context set for the management cluster, we create a namespace for Kubeapps and install away!
kubectl create ns kubeapps

helm install --namespace kubeapps kubeapps bitnami/kubeapps --values ~/path/to/your/kubeapps-tkg-values.yaml
Once the pods are all up and running, check for the frontend loadbalancer domain name given by AWS:
kubectl -n kubeapps get svc kubeapps
and open it up in a browser to verify that you can see kubeapps at that address. Note that logging in wil result in a bad request until we update Dex’s configuration.
Configuring a Kubeapps client for Dex
The last step is to edit the Dex config adding a kubeapps-oauth2-proxy client and importantly, ensuring that Dex views the kubeapps-oauth2-proxy client as a trusted peer of each cluster client. This allows us to request that the cluster client-ids be included in the audience of the returned token for the kubeapps-oauth2-proxy, which in turn enables the API servers of each cluster to trust a token issued to the kubeapps-oauth2-proxy client.
So we edit the same Dex configuration file which we previously worked with while setting up the authentication for our TKG clusters:
vim tkg-extensions-v1.1.0/authentication/dex/aws/oidc/04-cm.yaml
and add a second static client for the second workload cluster (the name must match the name of your second workload cluster, but you don’t need any other secret or redirect URIs since we didn’t install Gangway on the second workload cluster) and a third static client for the kubeapps-oauth2-proxy. Note that the client entry for both clusters are listed as trusted peers of the kubeapps-oauth2-proxy client:
    staticClients:
    - id: my-oidc-cluster
      redirectURIs:
      - 'https://<existing value for the DNS of the API server for my-oidc-cluster>/callback'
      name: 'my-oidc-cluster'
      secret: <existing value for clientSecret for my-oidc-cluster>
      trustedPeers:
      - kubeapps-oauth2-proxy
    - id: second-oidc-cluster
      trustedPeers:
      - kubeapps-oauth2-proxy
    - id: kubeapps-oauth2-proxy
      redirectURIs:
      - 'http://<kubeapps frontend dns entry>/oauth2/callback'
      name: 'Kubeapps on TKG test Login'
      secret: <kubeappsClientSecret>
While editing this file, if you’re using Google as your upstream identity provider, I recommend making one further change to ensure dex only allows authentication for emails from a specific domain. In the config section of the oidc connector, uncomment and set the following to match the email domains which you want to allow, for example:
        hostedDomains:
        - vmware.com
Bounce dex by deleting the dex pod after applying the config:
kubectl apply -f tkg-extensions-v1.1.0/authentication/dex/aws/oidc/04-cm.yaml
kubectl -n tanzu-system-auth delete po -l app=dex
With this, Dex will successfully authenticate, but Kubeapps still won’t let you in because your user doesn’t yet have access to the cluster. So switch to the first workload cluster and create the RBAC to give yourself cluster-admin:
kubectl create clusterrolebinding cluster-admin-mnelson --clusterrole=cluster-admin --user=[email protected]
and then repeat after switching context to your second workload cluster.
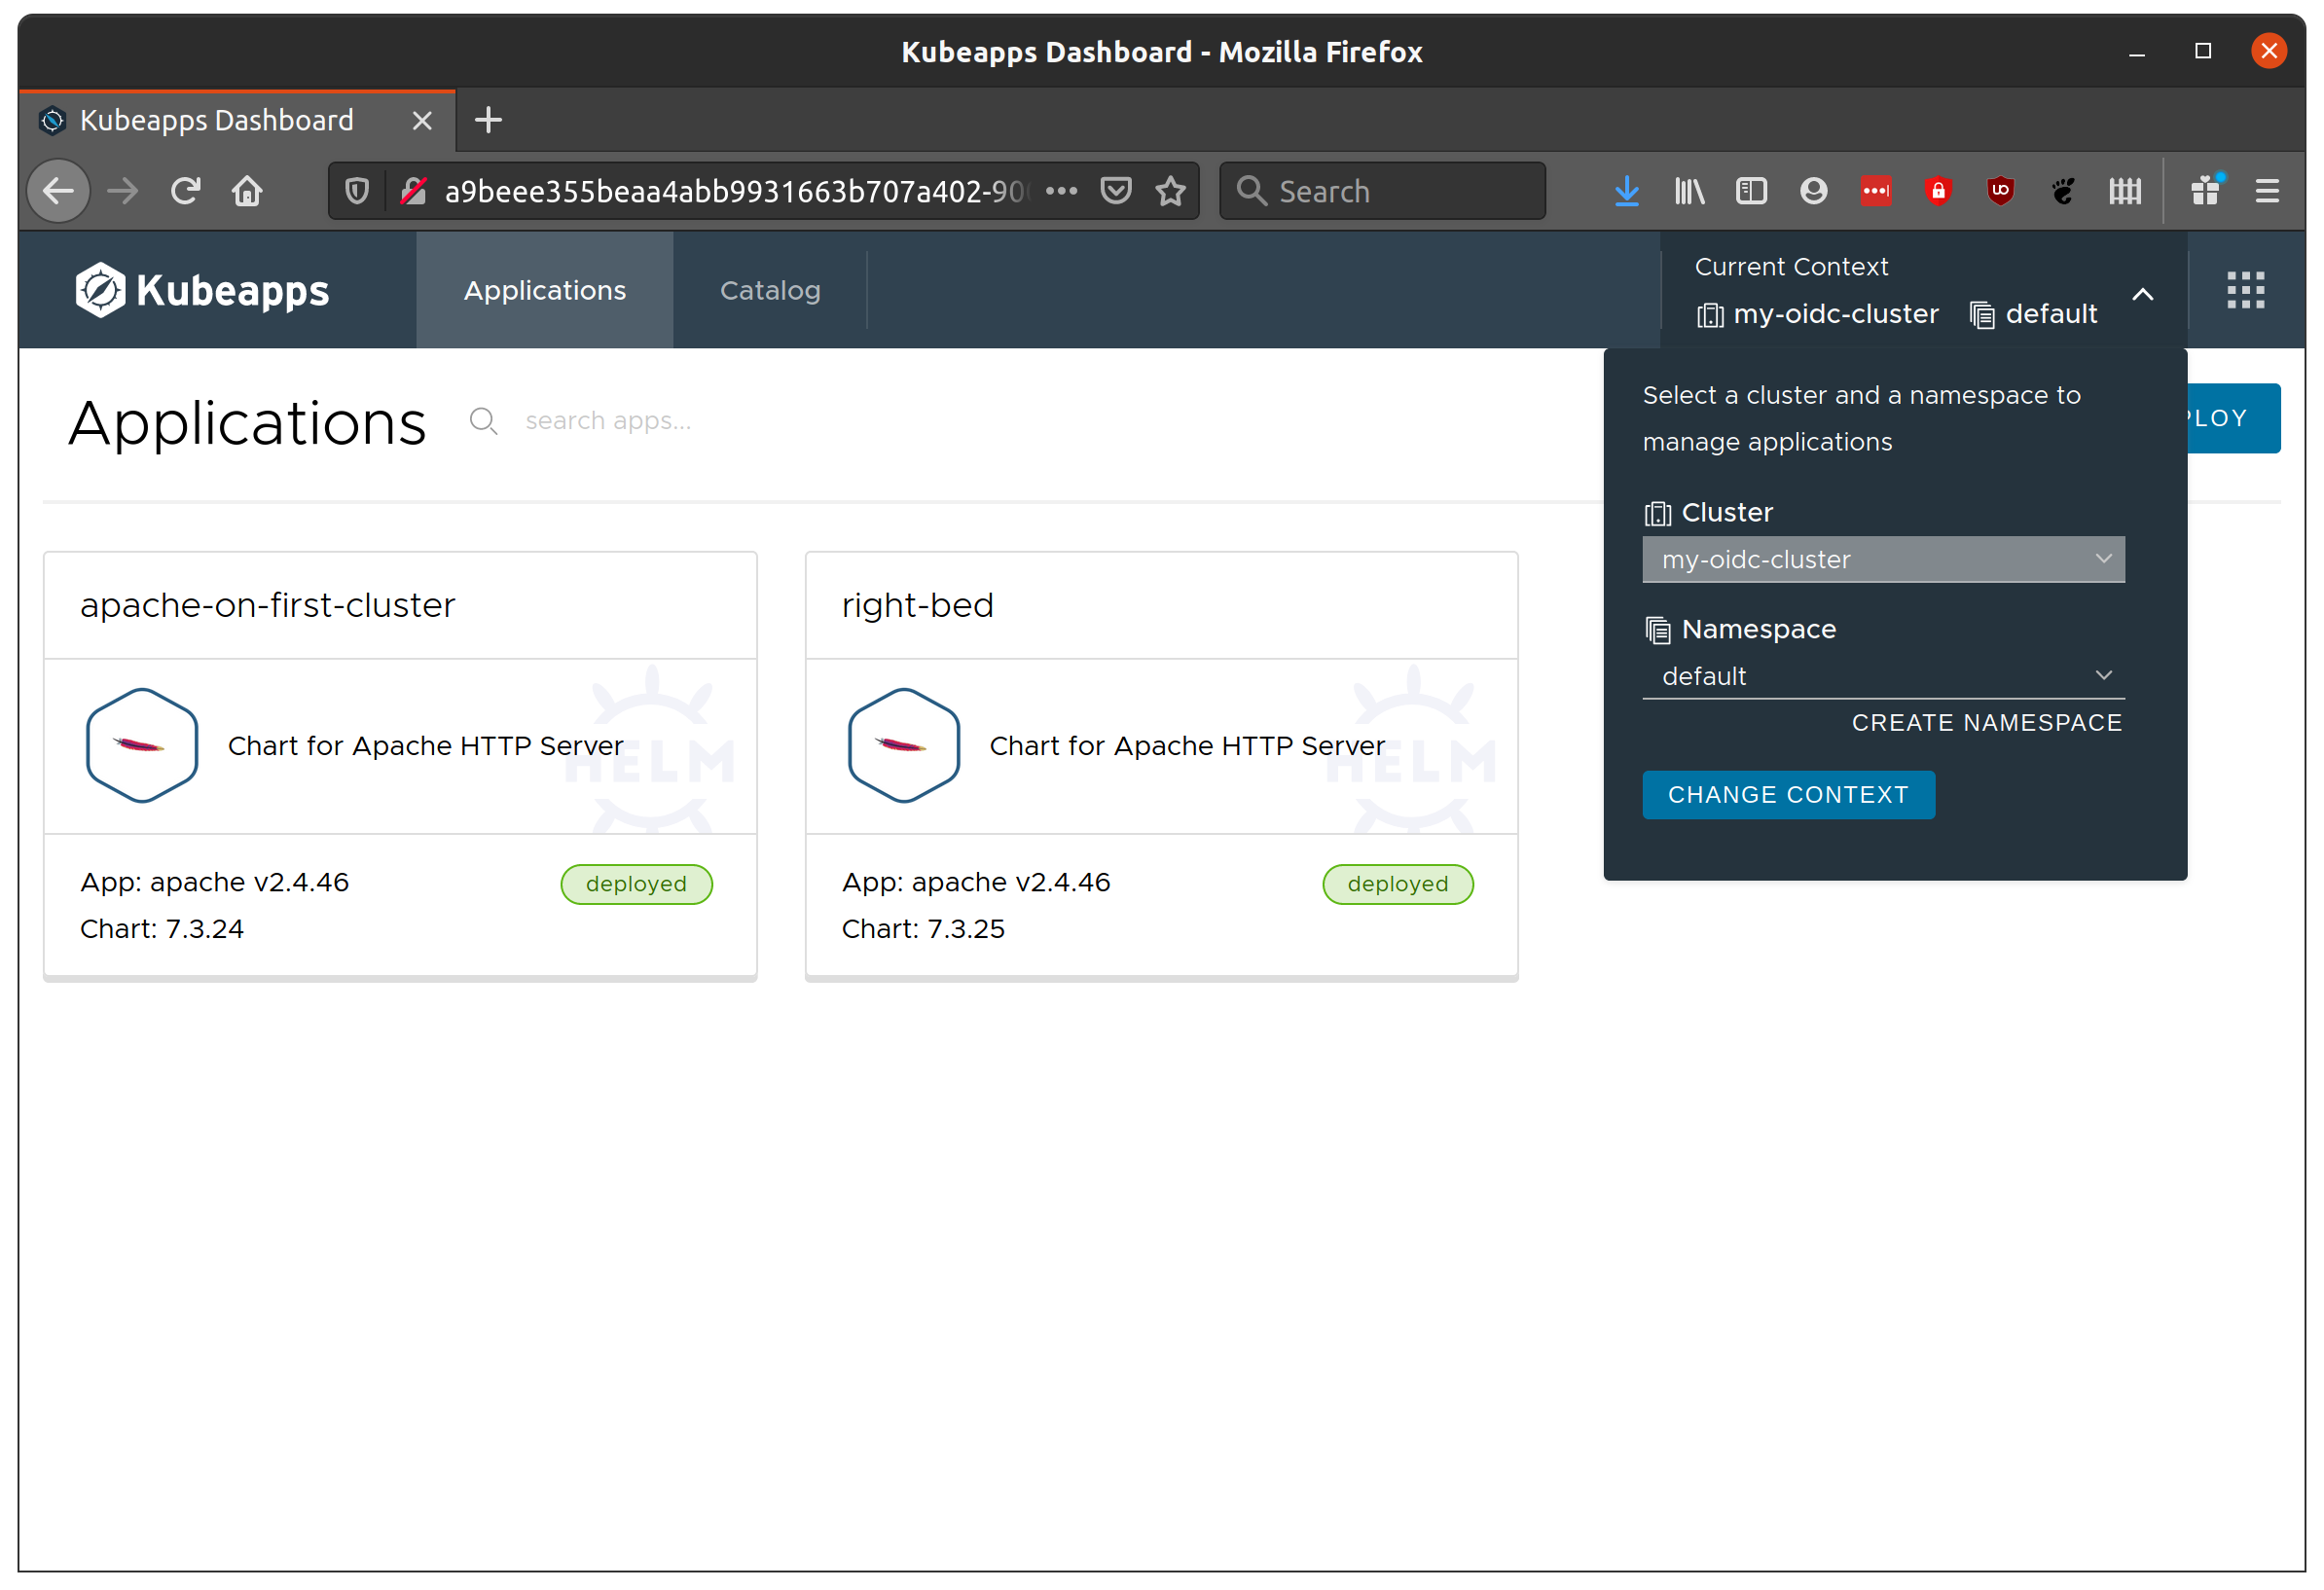
When you now login to Kubeapps, you should be presented with the UI including the option to switch between your clusters!
Well done! Of course, there are many points for errors which would require debugging here. If there’s a need, I’ll follow up with a common issues and how to debug.