We started the day at 7:45 heading up the hill in the basher to the North launch at Mt Borah again. After our first flight to the triange paddock we began doing solo flights so that after takeoff, Godfrey hands us over to the landing-site instructors, Karl and Bob, but they only use the radio if necessary. On my last flight for the morning I got to fly with another student all the way from Mt Borah back to the paddock outside the headquarters building! The afternoon saw us doing more reverse inflation ground handling as well as some more theory for landing approaches and handling injuries.
Disclaimer: This is part 6 of an 8 part series detailing what I learned and experienced recently while undertaking the fantastic paragliding course with the team at FlyManilla. You can find links to the rest of the details for each day from my overall course summary. I’m taking notes for my own personal reference and learning while it’s fresh, but it’s totally possible I’ve remembered incorrectly and have made mistakes. These are not notes for others to learn from but may give an interested passer-by who is considering a course a good idea about how valuable the course at Manilla is. If you’re interested in learning to paraglide, I’d totally recommend this live-in 9-day course at FlyManilla.
I had an interesting cascade of events on my first solo flight: as I was about to do the last 180 turn of my beats at the end of the landing field, I got a very small thermal bubble of lift so put off my turn for 3-4 seconds longer than I’d planned, but this was 3-4 seconds further away from the edge of the field where I was landing. When I’d done my 180, I was realising I was lower than I had wanted to be which was no problem but was a change to my plan so I was focusing on correcting this, doing my 90 degree turn earlier than expected to face the wind and then gently came towards the ground as Bob jumps on the radio: “get into landing position”. I was pushing my self out and getting my legs down straight away and everything went fine, but I would have otherwise been skidding along on the harness (normally something you should do only for a fast landing, letting the harness’s impact foam absorb the impact rather than breaking an ankle). A good lesson to learn in how a small cascade of events can lead to forgetting something which you’d normally not forget.
Once landed and our gliders in the stuff-sacks, we just find a shaded spot at the pickup point and wait for the basher to take us back up, while watching the others coming down:
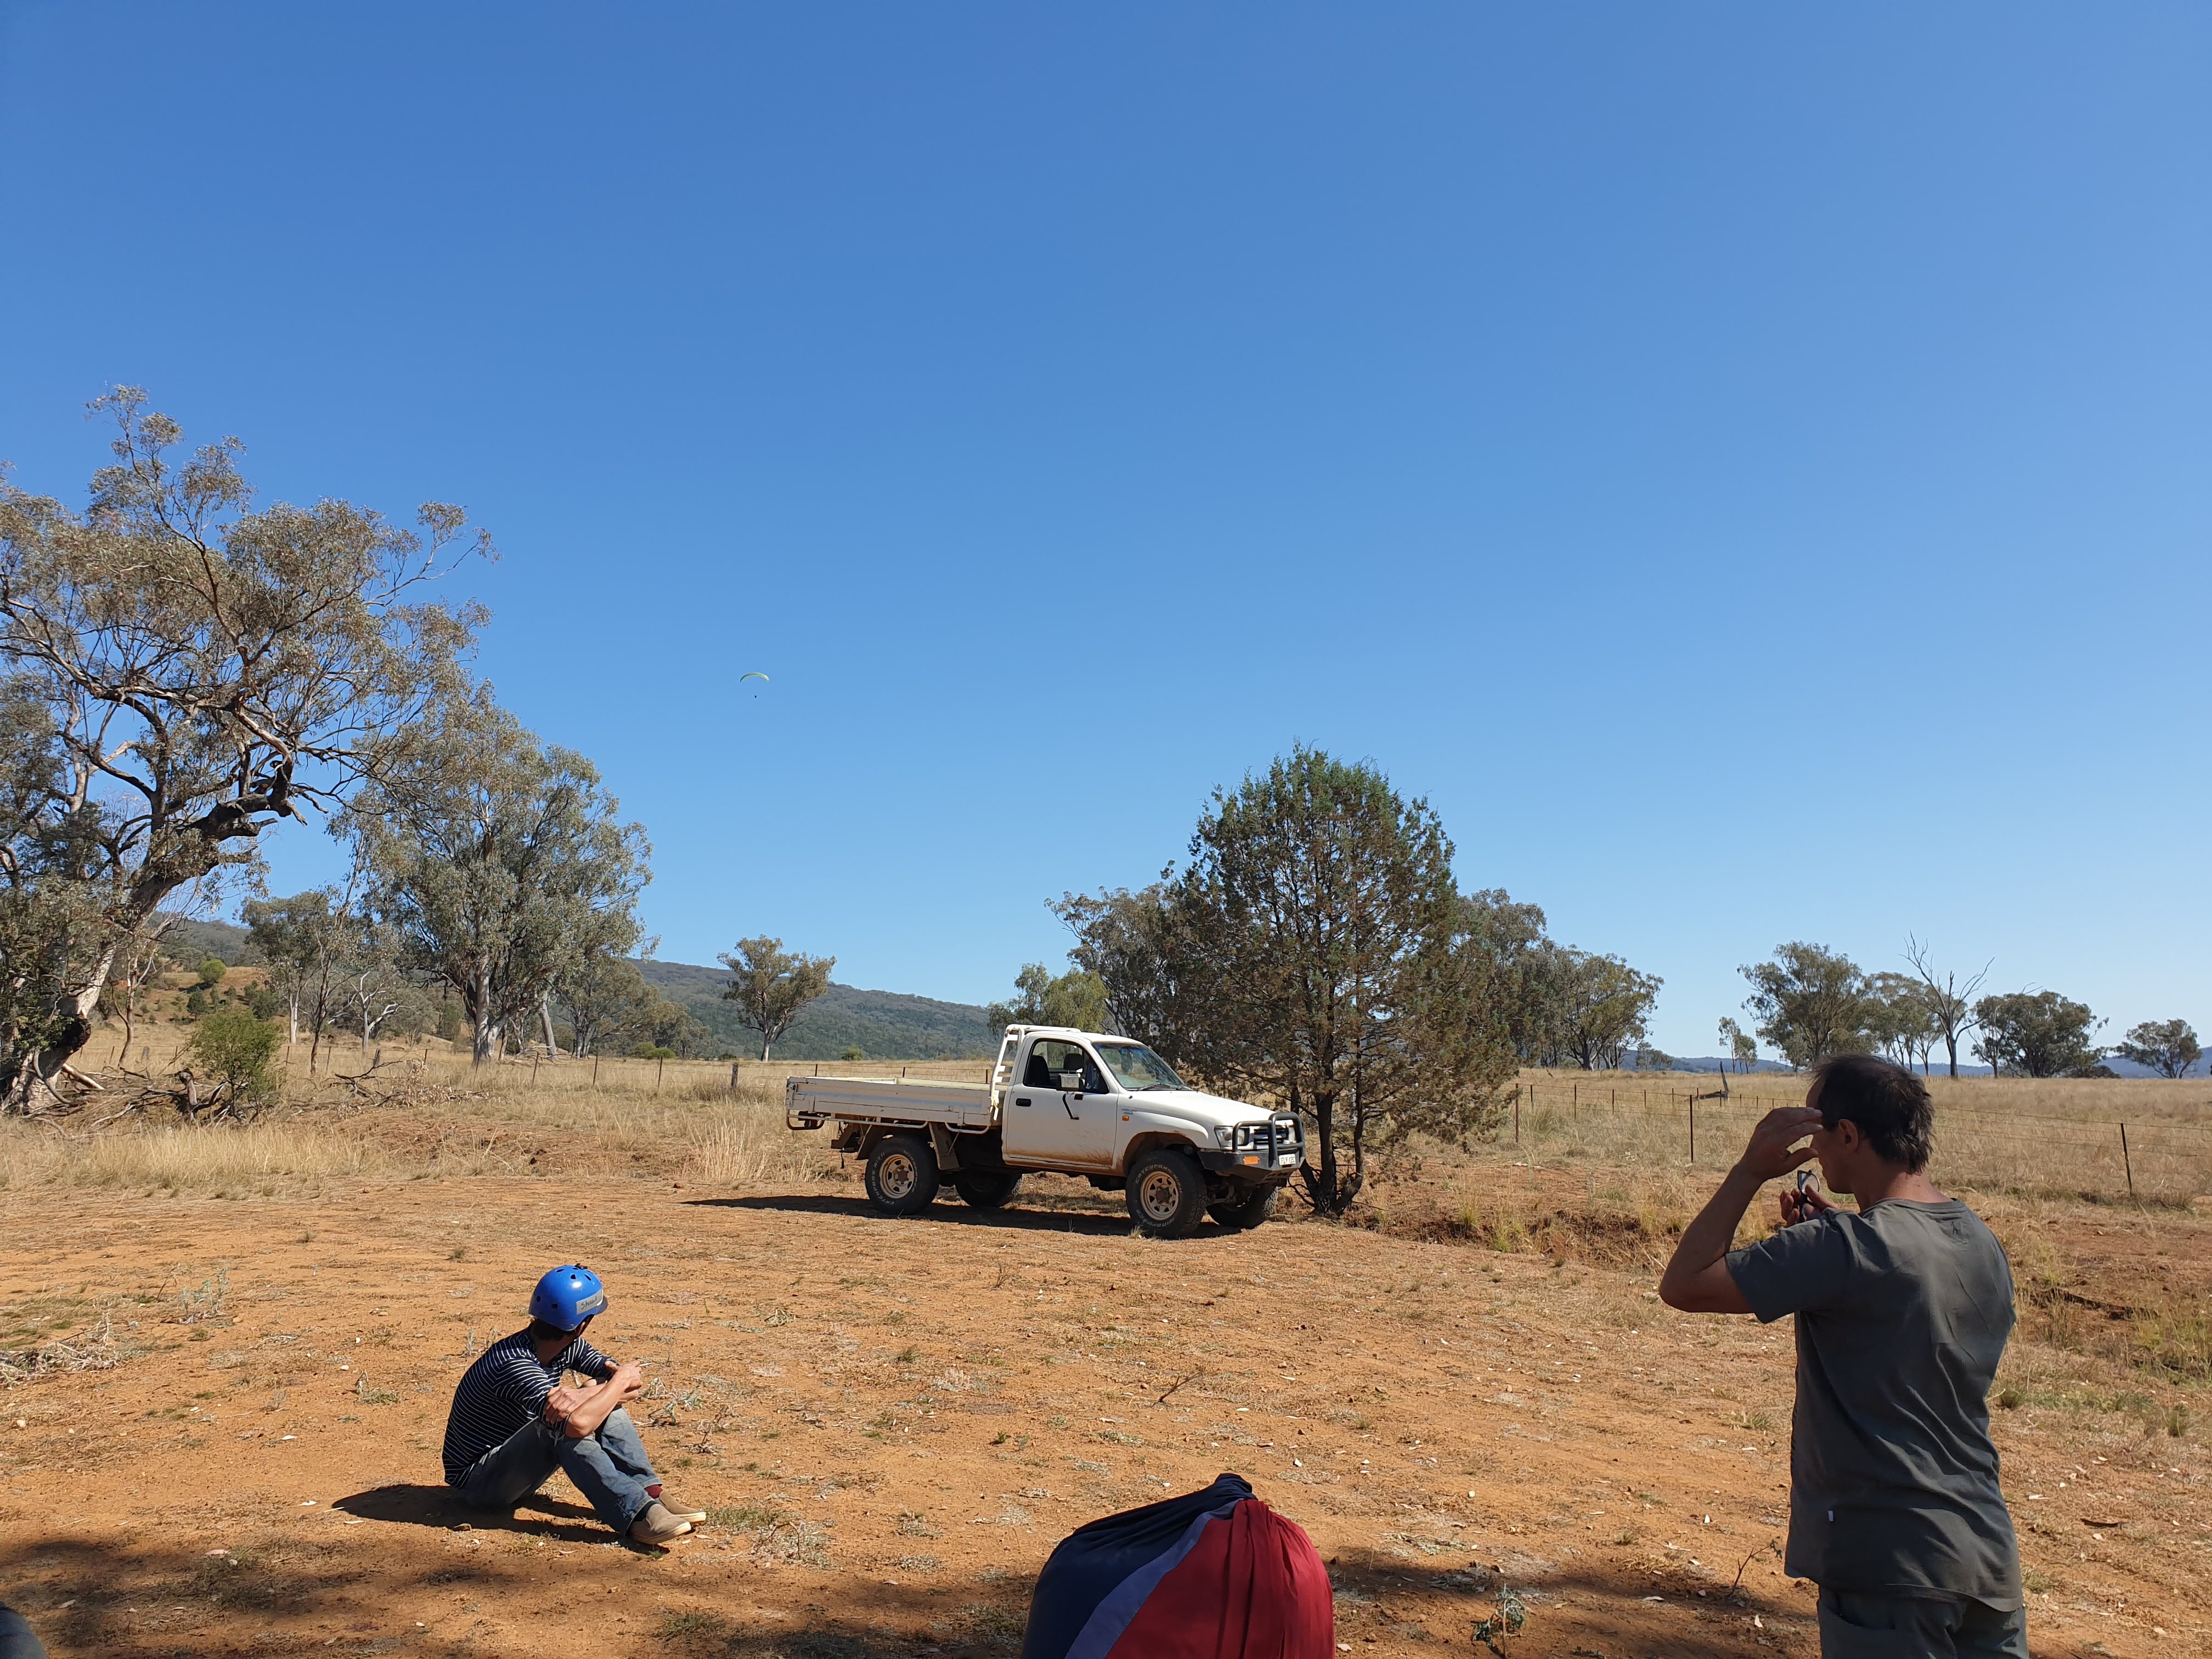
The weather for the morning remained excellent, getting slightly more thermic as the day passed. Most people got in 4 high flights to practise flying solo, but a few of us were lucky to get a 5th. On that fifth flight we were going to practise doing 360 degree turns if we got a bit of height and sure enough there was a thermal not far from launch that Godfrey got us circling in, getting a couple of us up to between 1500m and 1800m. The view was just incredible. I’d been focusing so much on the 360s (counting how long it takes for each quarter - between 4 and 5s) and enjoying the expanding view that it was only when I looked down and saw the launch site a long way directly below that I realised how high I was.
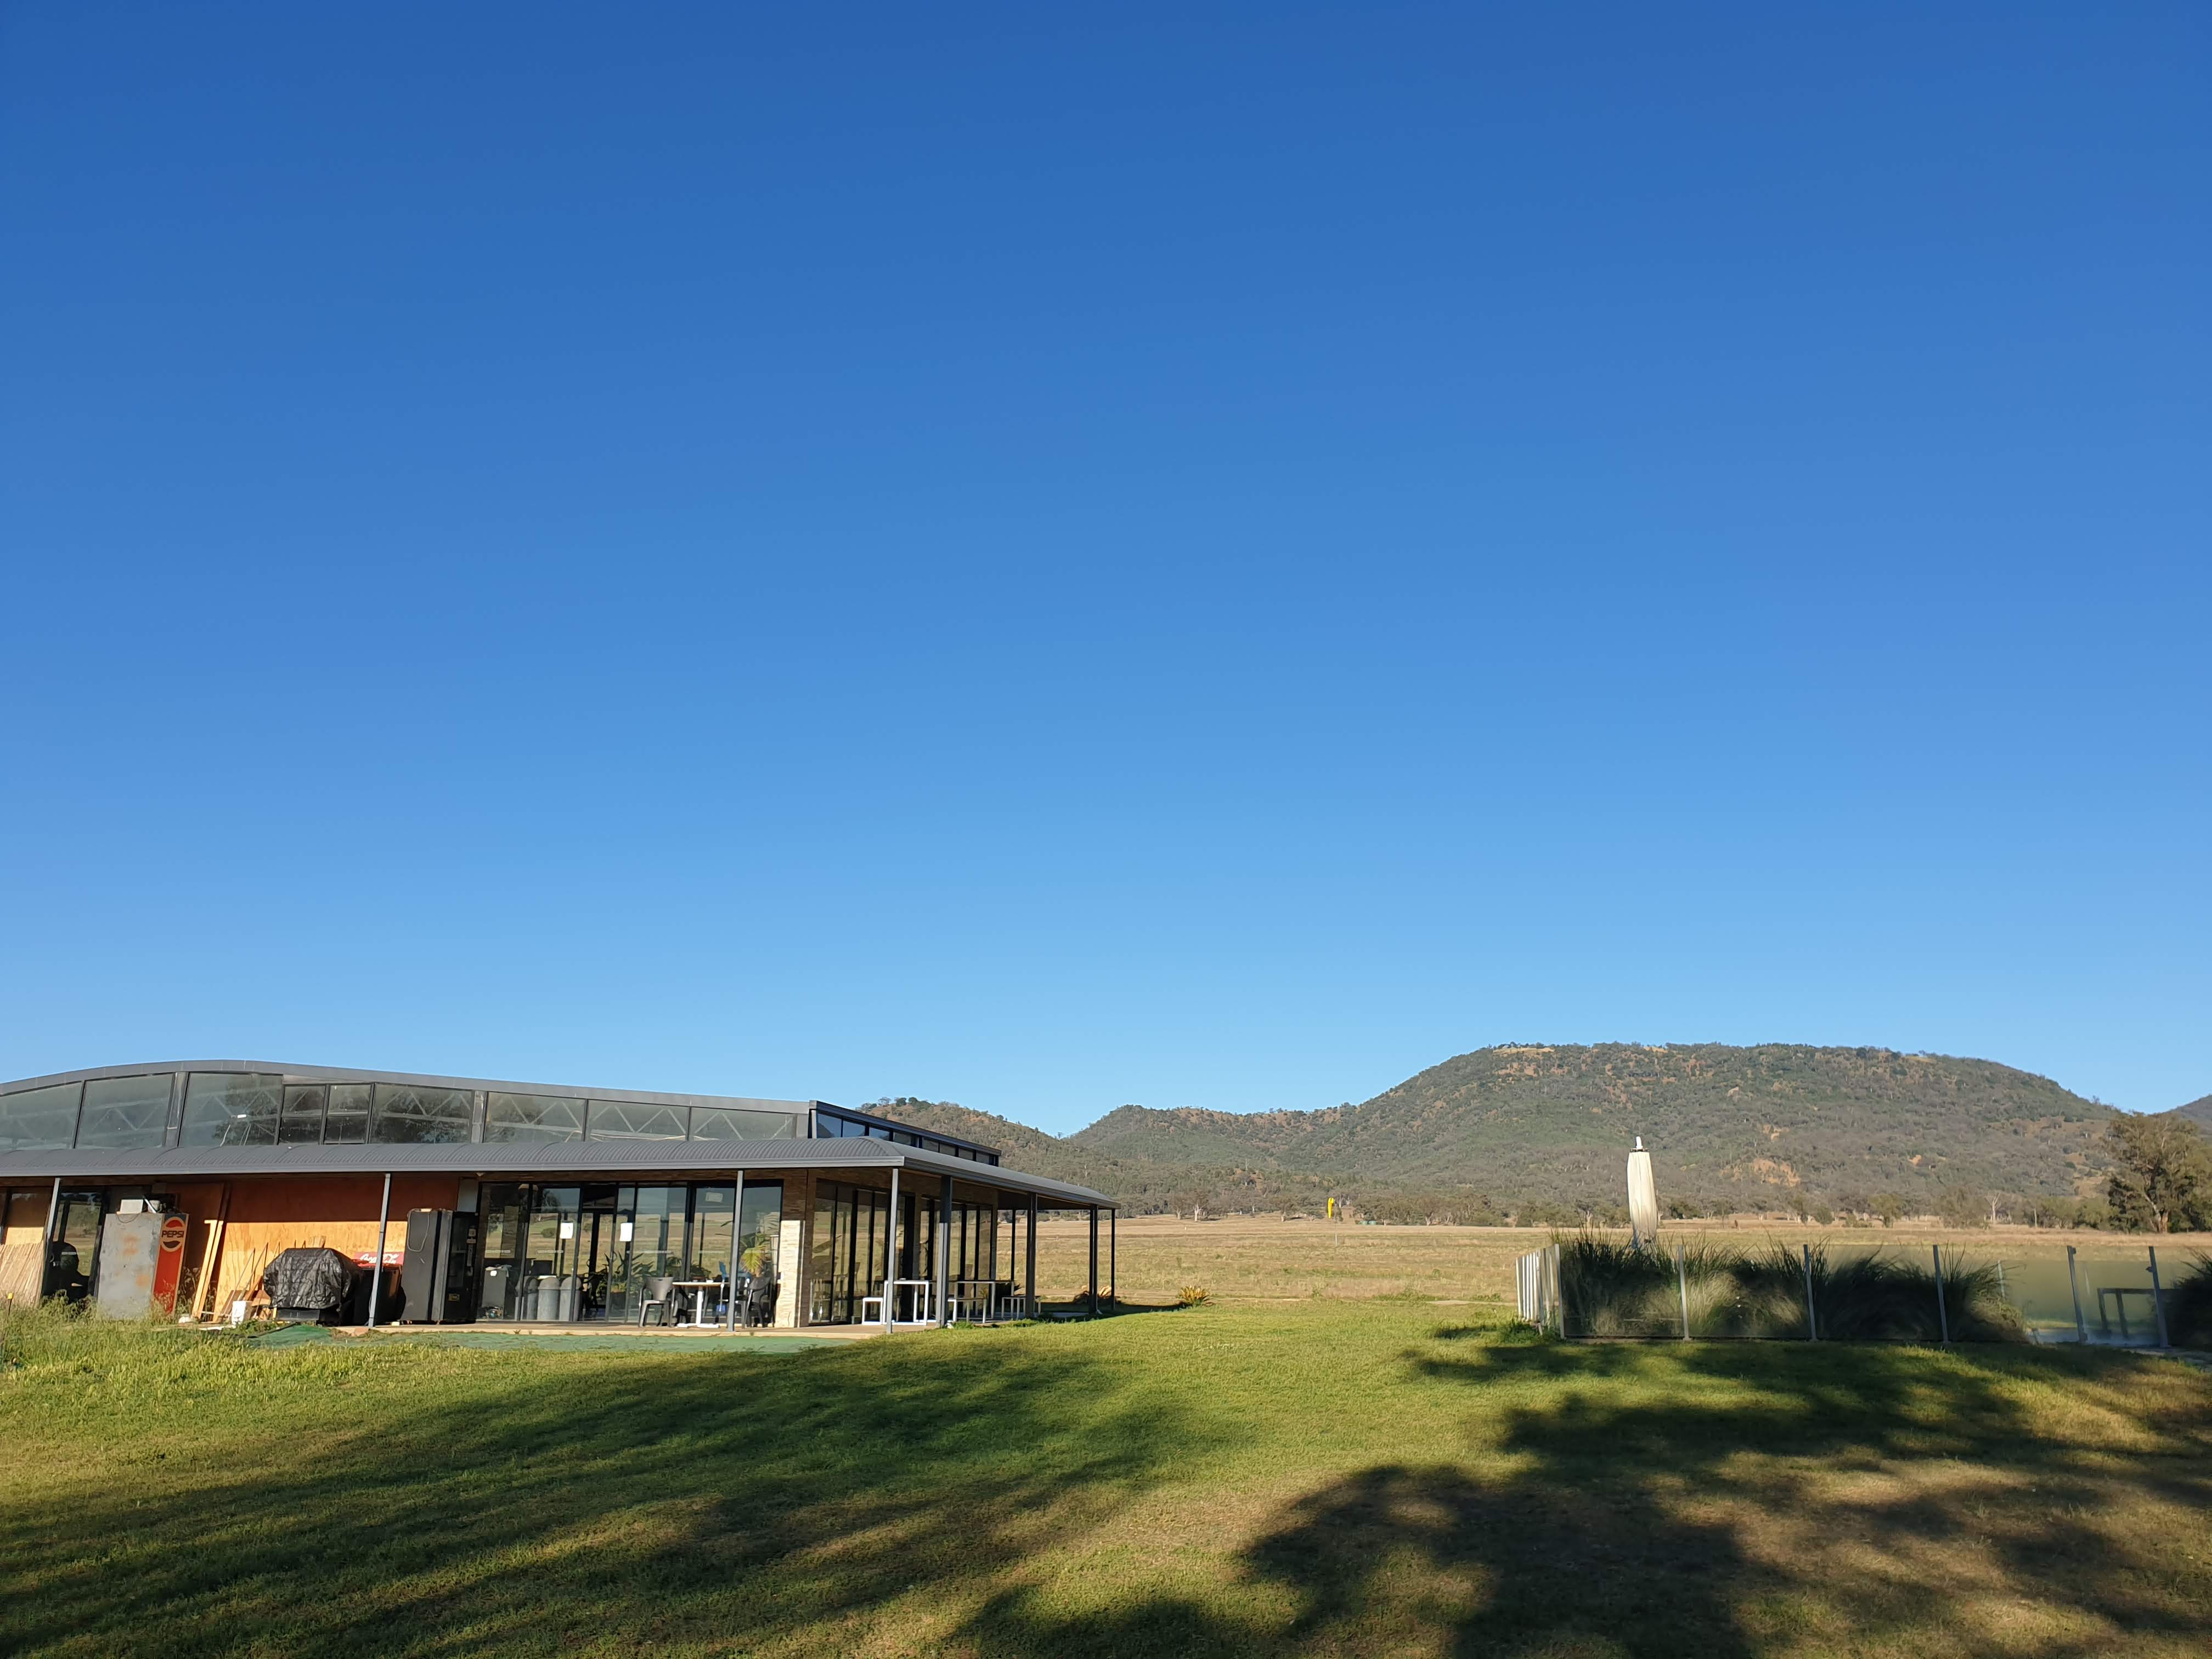
The two of us then flew directly back to the paddock near the headquarter building, with Karl jumping in the ute to be there as we approached and guide us in safely. It was an amazing experience to thermal and fly for just over 0.5hr - it took quite a while to lose the height on my beats at the landing paddock! Below you can see the HQ building with the paddock in front (you can just make out the yellow wind-sock) and Mt. Borah in the background, the northern launch on the right.
Debrief notes
A few points that the instructors mentioned during our debrief:
- Always fly away from the hill on takeoff - do not turn too early, once clear of the launch site, settle back into the harness and only then, when you’ve some height, begin your turn. You want to have enough distance between you and the ground to recover from any collapses etc.
- If you’re circling in a thermal and and part of your wing moves out, the thermal will try to tip you out as the remaining part continues to lift. As soon as you feel the wing tipping, use more weight shift to continue your turn, with a bit more brake if necessary.
- When doing your beats for landing, make sure you weight shift to make the turns flatter which means they’re less dangerous (less energy as they’re not swinging you out at a higher speed)
- Use the beats to take note of the wind, where you’re having to crab, confirming the windsock direction on each beat.
Reverse inflations
We took a break and then came back to do some theory before and after lunch (notes below) by which time the wind in the paddock had picked up, so we planned to head out to do some ground handling, practising our reverse inflations. By the time we were coming together to do the ground handling, it was obvious something was not OK. People were rushing about, driving off in cars - there had been an accident up on the West launch of Mt Borah (unrelated to our course). Two people who are part of our course happen to be a trained medic and a nurse, so after checking whether there were medics up there, they jumped in and drove straight up as did another nurse who’s staying here for the moment together with other people for support (update: the person was taken to hospital with two broken bones, but otherwise stable).
The rest of us couldn’t do anything more to help so headed out with Karl into the paddock. This time the wind was being cooperative on and off, so we had a chance to practise the reverse inflation and even turning to run. As always, Karl is more than happy to run through how he does this safely and consistently:
Reminder, always check from the carabiner outwards, so:
- first that the risers are untwisted from the carabiner,
- lift all the risers on one side up as if in flight and verify that the A is in front and the brake is at the rear,
- check that the brake line goes directly to the pully without twists or wraps around other lines or risers,
- grab the brakes (left in left hand, right in right hand),
- in one movement take and grip firmly the rear risers in your left hand,
- in a similar movement reach under the risers and take the A of the left then right risers,
- ensure the quick-links are lined up together in each hands firm grip,
- right hand above, left below, but importantly your hands should be perfectly vertical (right above left, that is)
At this point, the most important thing is to be facing into the wind so the wing can come up straight with little adjustment and the easiest way to do this is to build a wall by pulling slightly with your right hand to fluff the wing out and inflate a little then let it down again (stepping forward to avoid the leading edge folding over). When an appropriate puff of wind is available, step backwards and keep (trying to) step backwards in the straight line that you chose - how quickly you do this depends on the strength of the wind. If the glider is crooked, just let it down again and reset. If it comes up straight but slightly off centre, you can correct this with your left hand (holding the broomstick analogy) while continuing to walk backwards along your line. Finally, you should have already checked that all lines are clear and that the wing is inflated while continuing to walk. If clear, keep moving, drop the risers and turn right (for me) to build up speed or abort if something is not right.
So the key point I learned from Karl that helped hugely was that, yes we’re balancing the big broomstick, but not so much with our bodies, only with our left hand once the glider is up almost straight. The glider should come straight up (or we should reset) and we should walk continuously backwards to keep the wing from stalling, without moving side-to-side (which changes the forward velocity).
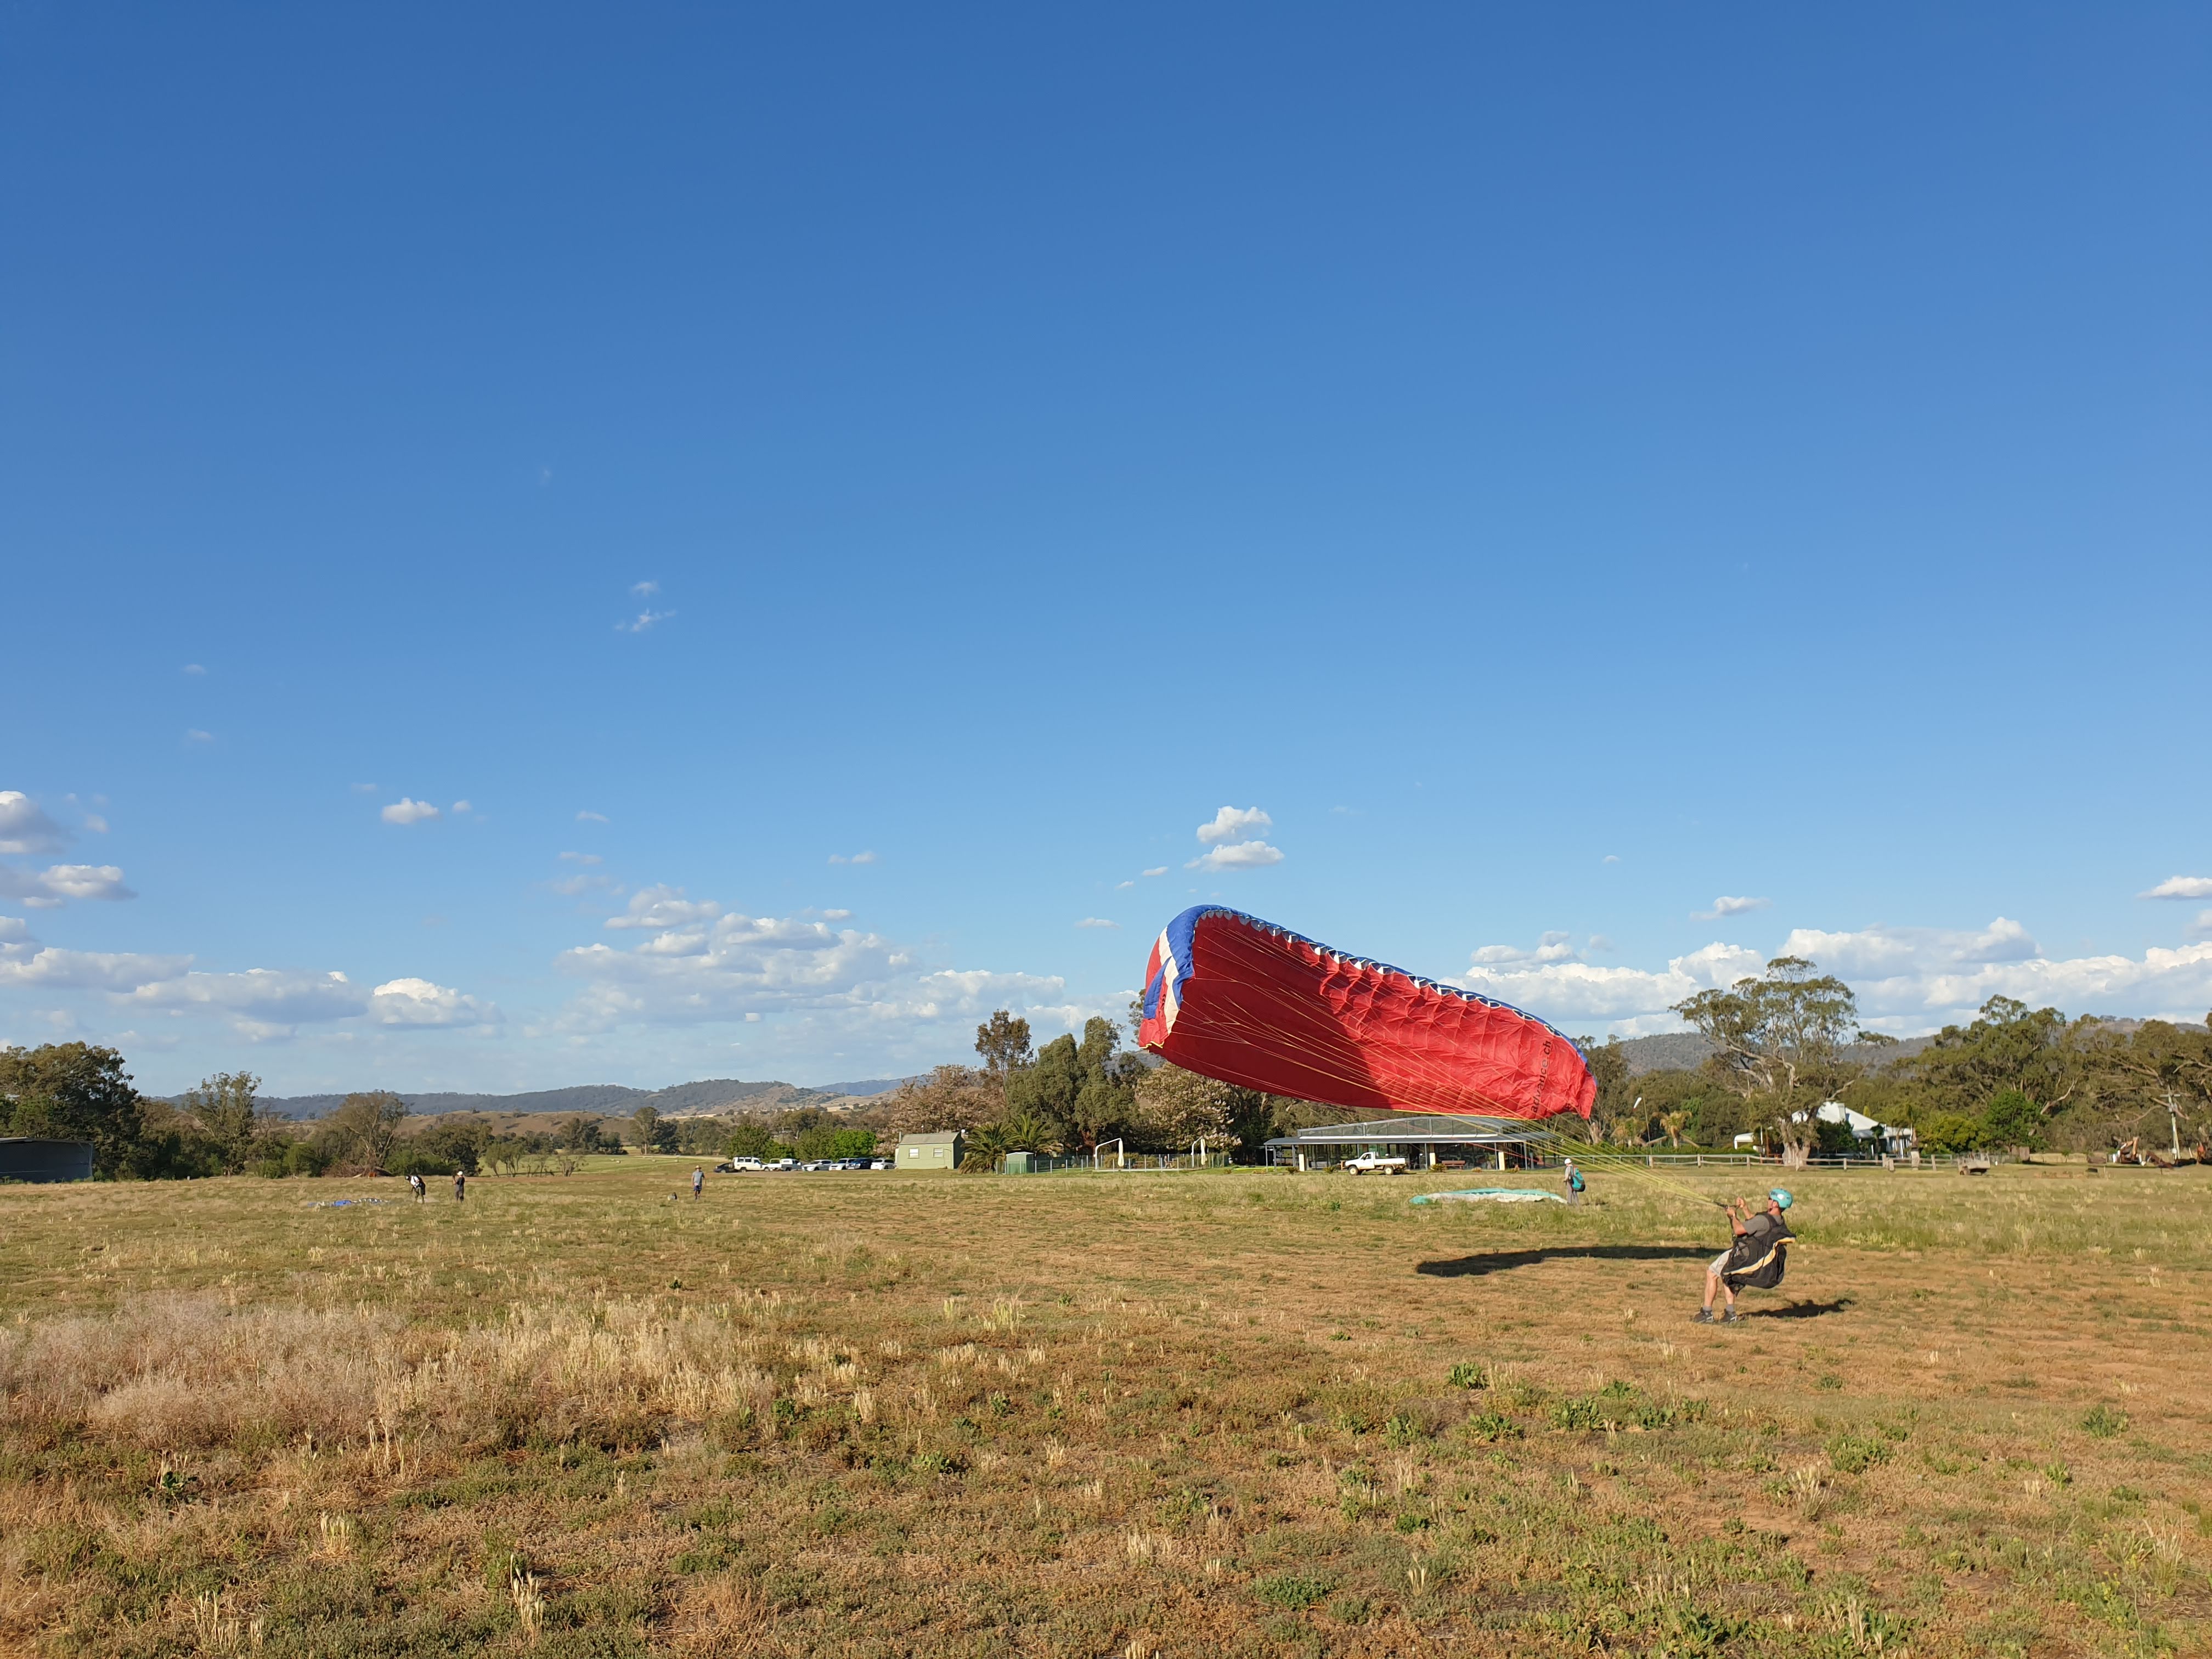
This photo shows us ground handling in the paddock next to the head quarter building (which is aptly shaped like an airfoil itself):
In practise I found that how suddenly I pulled the wing up changed how quickly I needed to turn and run - it took a bit of feel to get to know how strong to do this depending on the wind. Sometimes I even braked slightly as it was shooting past my head so quickly, but I’m not sure that’s a good idea (Bob later confirmed on a takeoff that this is sometimes required if the wing shoots up too fast, just gently braking to avoid it going over towards a frontal collapse) as I then had to speed the wing up again with my shoulders after turning and running.
Theory notes
How to avoid being blown behind an obstacle or mountain
The first thing is don’t fly in windy conditions. If the paraglider is going to be moving at just over 30km/h when you’re landing you don’t want a wind that’s going at 30km/h. Remember that there will usually be a compression over the hill or cliff, so the fact that it’s 15km/h at your level doesn’t mean it’ll be 15km/h at the level the glider will be when it comes up.
If you’re already up in the air, you can check whether you’re able to move forward into the wind or how much you are needing to crab to move across the wind. If you face the wind and pull your brakes to carabiner level (20%) you will be going approximately 30km/h. If you’re not moving with respect to the ground, or moving very slowly, alert, this is an emergency situation. Sometimes a GPS will show you your ground speed so again, if it shows you’re going 10km/h or less into the wind, alert, this is an emergency.
Use the speedbar to try to punch forward and down into the wind towards your landing zone. If you can see a storm coming then also pull your big ears and steer with weight shift instead, as there will be faster winds ahead of the storm.
One sign of increasing wind strength when you are ridge soaring is that you’ll find you’re getting higher than you usually would. Don’t attribute it to your improved skill, get down to the ground.
If the wind is faster than you can travel forward even with the speed bar, do not land just back from the cliff or behind the mountain as this is where the most turbulent rotors will be. The sharper the cliff or mountain, the more turbulent the air directly behind it will be at slower wind speeds. If and only if you find yourself in this situation, gain as much height as you can from the ridge and then “turn and burn”, 180 degrees to fly with the tail wind as far as you can from the mountain to out fly the rotors and turbulence, turning to land at the safest point but still anticipate turbulence (keep some brakes on).
The other scenario you may find is that you take off thinking it’s fine but straight away realise that you’re not able to go forwards. You need to react quickly in this situation as you are moving closer and closer to the rotor turbulence. Apply big ears straight away to descend, you may need to hold the ears on until the ground, or let them out for your flare, depending on the wind.
When landing, remember it will be a strong wind landing, so turn, wrap, pull.
Accepted landing approaches for a paraglider
There are two accepted landings for paragliders, depending wether you’re landing in a small field or a large field.
Unobstructed field
Powered aircraft generally do what is known as a left-hand circuit to the runway. That is, if you were looking down the runway in the direction of landing, the plane would first approach in the opposite direction of the landing, parallel and to the left of the runway flying past the end of the runway then doing two 90 degree turns (a u-turn, effectively) before starting the final approach.
If a paraglider is landing in an airfield, they should either do a dead-side approach (basically a mirror of the left-hand circuit on the right hand side where there is no traffic) to land not on the runway, but in the field next to the runway.
At Stanwell tops, the landing in the park requires a left-hand circuit approach due to the traffic - if everyone was doing beats at the end of the field it would get quite tricky.
Small field landing
This is basically what we’ve been doing all week: doing figure 8 S-turns (or beats) at the base of the field, perpendicular to the wind direction (called a baseline approach). In reality, this is nearly always what we want to do since it’s much safer in lower traffic environments.
What to do if you’re injured on landing
First, assess the situation and remain under control. Don’t move too much. If you feel any pain in your back, no matter how small, do not move. Back injury is most common if you’re falling from 10 - 20m. Sometimes people suffer a broken leg. The Femur is particularly dangerous especially if the brake is exposed, as there could be arterial damage.
Raise the alarm, tell people where you are. This could be difficult as your eyesight could be foggy. You need to give clear instructions when flying - your distance, height, intentions so that it’s easier to find you without info if something goes wrong. Apps like What3Words can be helpful to share your location, or just Google maps. There are also products around like Spot Gen 3 or the Garmin InReach which will automatically send updates so people know if your position doesn’t change during a trip that something is wrong.
If you see someone have an accident, evaluate very carefully before landing nearby, as the reason for their accident (such as rotor turbulence) could still be present (this is the D - Danger, in DRSABC).
DRSABCD - Danger, Response, Send for help, Airway, Breathing, CPR, Defibrillation - learn some basic first aid and carry a kit.
Altimeters and Variometers
An Altimeter is an instrument for measuring altitude and is required for any air travel above 300ft, where as a Variometer is a vertical speed indicator (VSI). These are generally combined into a single product - a Vario. Some people have specific flight instruments with more built in to a touch screen interface, but you’re then looking at more than a grand. Others just use apps on their phones (but betware of battery drainage, which will be more than normal when you’re up above the towers and further from them), so make sure you carry a USB battery pack.