VMware Tanzu Kubernetes Grid (TKG) with OpenID Connect - First Experience
Andres and I have been doing quite a bit of feature work in Kubeapps over the past months at VMware and one of the key features that I’ve been working on personally is enabling Kubeapps users to deploy applications not only on the cluster on which Kubeapps is installed, but to multiple other clusters as well.
Enter VMware Tanzu Kubernetes Grid (TGK): an “Enterprise-ready Kubernetes runtime which streamlines operations across multi-cloud infrastructure”, so naturally I was keen to test out running Kubeapps on TKG and deploying applications to a set of TKG-managed clusters.
Enter Scott Rosenberg from a VMware partner company called Terasky, who has been doing a lot of helpful early testing of the multicluster support in Kubeapps. Scott suggested that it’d be awesome if Kubeapps could be installed on the TKG management cluster as infrastructure while configured so that users can only deploy apps to the workload clusters.
This series of two post details the steps that I took to make that happen with the latest Kubeapps running on a TKG management cluster (on AWS) configured to allow users to deploy applications to the workload clusters. Though details will differ, a similar configuration works on other non-TKG multicluster setups as well. This post focuses on the TKG setup required for workload clusters using OpenID Connect, while the followup post details the Kubeapps multicluster installation and configuration. The following video demos the result:
Creating the management cluster
I started with the docs for VMware Tanzu Kubernetes Grid 1.1 which is the
latest version of TKG at the time of writing. Following the instructions to
prepare to deploy management clusters to Amazon
EC2
was quite straight forward and only failed for me initially because I tried
with a poweruser (an Administrator with a few privileges related to IAM APIs
missing) rather than an admin user with full access to the IAM API. So take note, an administrator account with full API access really is required to run the clusterawsadm tool successfully (do you realise how hard it is to get access to such an account in a large corporate environment??).
I was then able to deploy the management cluster to Amazon EC2 with the
installer
interface
without any issues, simply starting the UI from the same terminal with tkg init --ui and the folowing choices:
- At step 6 in the VPC for AWS I chose to Create new VPC on AWS.
- At step 7 I selected the Development tile (ie. a single control plane node)
- At steps 8 and 10 I selected a
smallinstance given that my environment is just for my own testing and demoing.
Once that had completed, I played around a little, creating a workload cluster or two before deleting those and continuing with the task at hand: enabling workload clusters configured with OpenID Connect.
Ensuring workload clusters share the VPC with the management cluster
Although it’s not necessary, I followed the steps to ensure that further workload clusters which I deploy will share the virtual private cloud (VPC) of the management cluster. Essentially this was just taking a backup copy of my generated TKG config before editing the main config file as per the excellent documentation:
cp ~/.tkg/config.yaml ~/.tkg/config-orig.yaml
vim ~/.tkg/config.yaml
Using the TKG extension bundle for OpenID Connect authentication
One of the nice things about TKG is that VMware provides a bundle of extensions which you can choose to include to help further configure and manage your TKG environment with extra functionality for user authentication among other things. You don’t have to use these bundled configurations, you could roll your own configs using the same tools, but if you choose to, you can do so knowing that the binaries and images are all built and supported by VMware.
For the Kubeapps multicluster case, I’m particularly interested in the supported user authentication for the workload clusters’ API servers. This allows authentication with the workload clusters to be handled by third-party single-signon providers. Although we could configure our workload clusters to trust an established identity provider directly, such as Google, Github or Active Directory, it would be painful to later change that decision and need to reconfigure all clusters. Instead, Dex runs on the management cluster and acts as the trusted identity provider for the workload clusters, allowing us to configure our workload clusters to trust the Dex identity provider while we configure Dex itself to trust whatever established upstream identity provider we want. If we ever change identity providers, we need only update Dex’s config on the management cluster, not all our clusters. Pretty neat.
Installing Dex on the management cluster configured with a Google Identity Platform credential
I downloaded and extracted the
tkg-extensions-manifests-v1.1.0-vmware.1.tar.gz (the latest at the time of
writing) and followed the instructions to deploy Dex to my management
cluster running on
AWS. This is quite long and currently quite fiddly - in the future I imagine the TKG team will make this simpler using some sort of Kubernetes package. I setup using Google’s Identity Platform to create my OAuth2.0 / OIDC credentials as follows:
- At step 9 I replaced
<OIDC_IDP_URL>withhttps://accounts.google.com(and yes, this needs to be exact - an extra slash at the end will cause Dex to enter aCrashLoopBackOffas the URL won’t match what Google says it should be) - At step 14 I replaced
<CLIENT_ID>and<CLIENT_SECRET>with the Base64 values of the client id and secret that I’m presented with after Setting up OAuth 2.0 / OIDC credentials. For example, to get the base64-encoded value of the client id:
export CLIENT_ID_FROM_GOOGLE=whateverValueGoogleGivesYou
echo $CLIENT_ID_FROM_GOOGLE | base64
d2hhdGV2ZXJWYWx1ZUdvb2dsZUdpdmVzWW91Cg==
- You will also need to set a redirect URL while setting up your credentials. For this you will need to use the hostname of the Dex services loadbalancer as per step 4 and append the path
/callbackusing thehttpsprotocol, as this is where Dex is configured by default to receive redirects from the auth provider. For example,https://abc123abc123abc123abc123abc123.us-east-2.elb.amazonaws.com/callback, whereabc123abc123abc123abc123abc123.us-east-2.elb.amazonaws.comis the value you obtain in step 4. - You can also add the same hostname without the path as an Authorised JavaScript origin for use with the Google identity client id, on the same page as the authorised redirect URIs. So the value for the Authorised JavaScript origin URI would be
https://abc123abc123abc123abc123abc123.us-east-2.elb.amazonaws.com
Configuring an OIDC-enabled workload cluster
I was then able to configure and deploy an authentication-enabled (OIDC-enabled) cluster with TKG with only one small hiccup. When I got to step 5 where you test creating the oidc-enabled cluster, I saw the following error:
$ tkg create cluster my-oidc-cluster --plan=oidc
Logs of the command execution can also be found at: /tmp/tkg-20200910T110807050315191.log
Validating configuration...

Error: : unable to get cluster configuration: unable to get template: failed to read "cluster-template-oidc.yaml" from provider's repository "infrastructure-aws": failed to read file "/home/homedir/.tkg/providers/infrastructure-aws/v0.5.4/cluster-template-oidc.yaml" from local release v0.5.4

Detailed log about the failure can be found at: /tmp/tkg-20200910T110807050315191.log
This appears to be because in Step 1, the instruction creates the file as:
mv tkg-extensions-v1.1.0/authentication/dex/aws/cluster-template-oidc.yaml ~/.tkg/providers/infrastructure-aws/v0.5.3/cluster-template-oidc.yaml
where as it appears to be needed in the v0.5.4 directory instead (I assume a newer version than was available when the docs were created):
$ mv ~/.tkg/providers/infrastructure-aws/v0.5.3/cluster-template-oidc.yaml ~/.tkg/providers/infrastructure-aws/v0.5.4/

$ tkg create cluster my-oidc-cluster --plan=oidc
Logs of the command execution can also be found at: /tmp/tkg-20200910T110925661328540.log
Validating configuration...
Creating workload cluster 'my-oidc-cluster'...
Waiting for cluster to be initialized...
...
(everything worked)
Continue on to configure your kubectl config and install cert-manager and we’re ready to add Kubeapps to the management cluster!
Testing the OIDC-enabled cluster with Gangway
From the Gangway README: “Gangway allows users to self-configure their kubectl configuration in a few short steps.” It’s a small OIDC-enabled application that allows you to log in via the configured authorisation provider (Google Identity Services in my case) and receive a custom kubectl configuration to access the cluster with kubectl as yourself.
Although Gangway is not required for the Kubeapps environment, I’d recommend continuing on to Enable Gangway on your OIDC-enabled cluster for this first workload cluster only for two reasons:
- The process gets you updating the Dex configuration adding a
staticClientfor the OIDC-enabled workload cluster. - It enables you to verify that the OIDC configuration is correct, before we assume it’s working and add Kubeapps to the mix.
But if you’re confident in your ability to independently debug potential issues, skip straigth along to create your second oidc-enabled cluster below.
Following the instructions to Enable Gangway on my OIDC-enabled cluster failed for me at step 3. I was unable to get the hostname of the Gangway service load balancer because a hostname was never appearing in the output of kubectl get svc gangwaysvc -n tanzu-system-auth. When running kubectl describe svc gangwaysvc -n tanzu-system-auth I would see the warning:
Warning SyncLoadBalancerFailed 2s (x8 over 10m) service-controller Error syncing load balancer: failed to ensure load balancer: could not find any suitable subnets for creating the ELB
Translation: AWS is unable to find a suitable subnet (of the VPC) within which it can create the Elastic Load Balancers. Why? So as far as I can tell, this is because I had a VPC created automatically when creating my management cluster - which importantly created and tagged a public and private subnet for use by that cluster - but I then updated my config so that subsequent workload clusters would share the VPC with its public and private subnets, without updating the tags for the subnet to indicate that it can be used for my workload cluster.
To fix this, navigate to the list of subnets for the region you’re working in, for example, for us-east-1 you will find the list at https://console.aws.amazon.com/vpc/home?region=us-east-1#subnets:sort=desc:tag:Name. In this list you will see a -public and -private subnet prefixed by the name of your management cluster, for example, in my case I see:

If you click on the first subnet, the public one, the details will be displayed including a Tags tab. Click on the Tags tab and you will see that the subnet includes a tag for your management cluster. So in my case, I see the tag kubernetes.io/cluster/mnelson-test-tkg with the value shared. This tag enables AWS to know that it can use this subnet for a public load balancer for my management cluster. Add a new tag for your workload cluster to the subnet. In my case, I added the tag kubernetes.io/cluster/my-oidc-cluster with the value shared to both the public and private subnets created for my management cluster. Once this was done, the Gangway service was assigned a hostname and I could continue… through to step 4.
For step 4 you need to know the <APISERVER_URL> for the workload cluster. To find this, navigate within the AWS console to the EC2 service where you can list the load balancers. For the us-east-1 region, this will be https://console.aws.amazon.com/ec2/v2/home?region=us-east-1#LoadBalancers:sort=loadBalancerName. Within the list you’ll find a load balancer with a name matching your workload cluster (eg. my-oidc-cluster-apiserver) and need to use the associated DNS name.
Step 18 (yes, there are that many steps) is the part that is most relevant to us: updating the Dex configuration with the details of the workload cluster. Note that each OIDC-enabled workload cluster that we deploy via TKG will be configured to use its own cluster name as the client_id when verifyng the signed id_tokens that are sent with a request to the API server. We will be updating this again later with the Kubeapps client id, but for now it’s worth noting the format (each client ID has a name and a list of redirect urls).
With the Dex service bounced after updating the config, we can verify the OIDC login is working by following the documentation Access the OIDC-Enabled Cluster with your IDP credentials. Note that currently step 3 assumes you are deploying on vSphere. To get the DNS entry for the Gangway service, you will instead need to:
kubectl -n tanzu-system-auth get svc
and then access that service at https://<Gangway LB DNS>
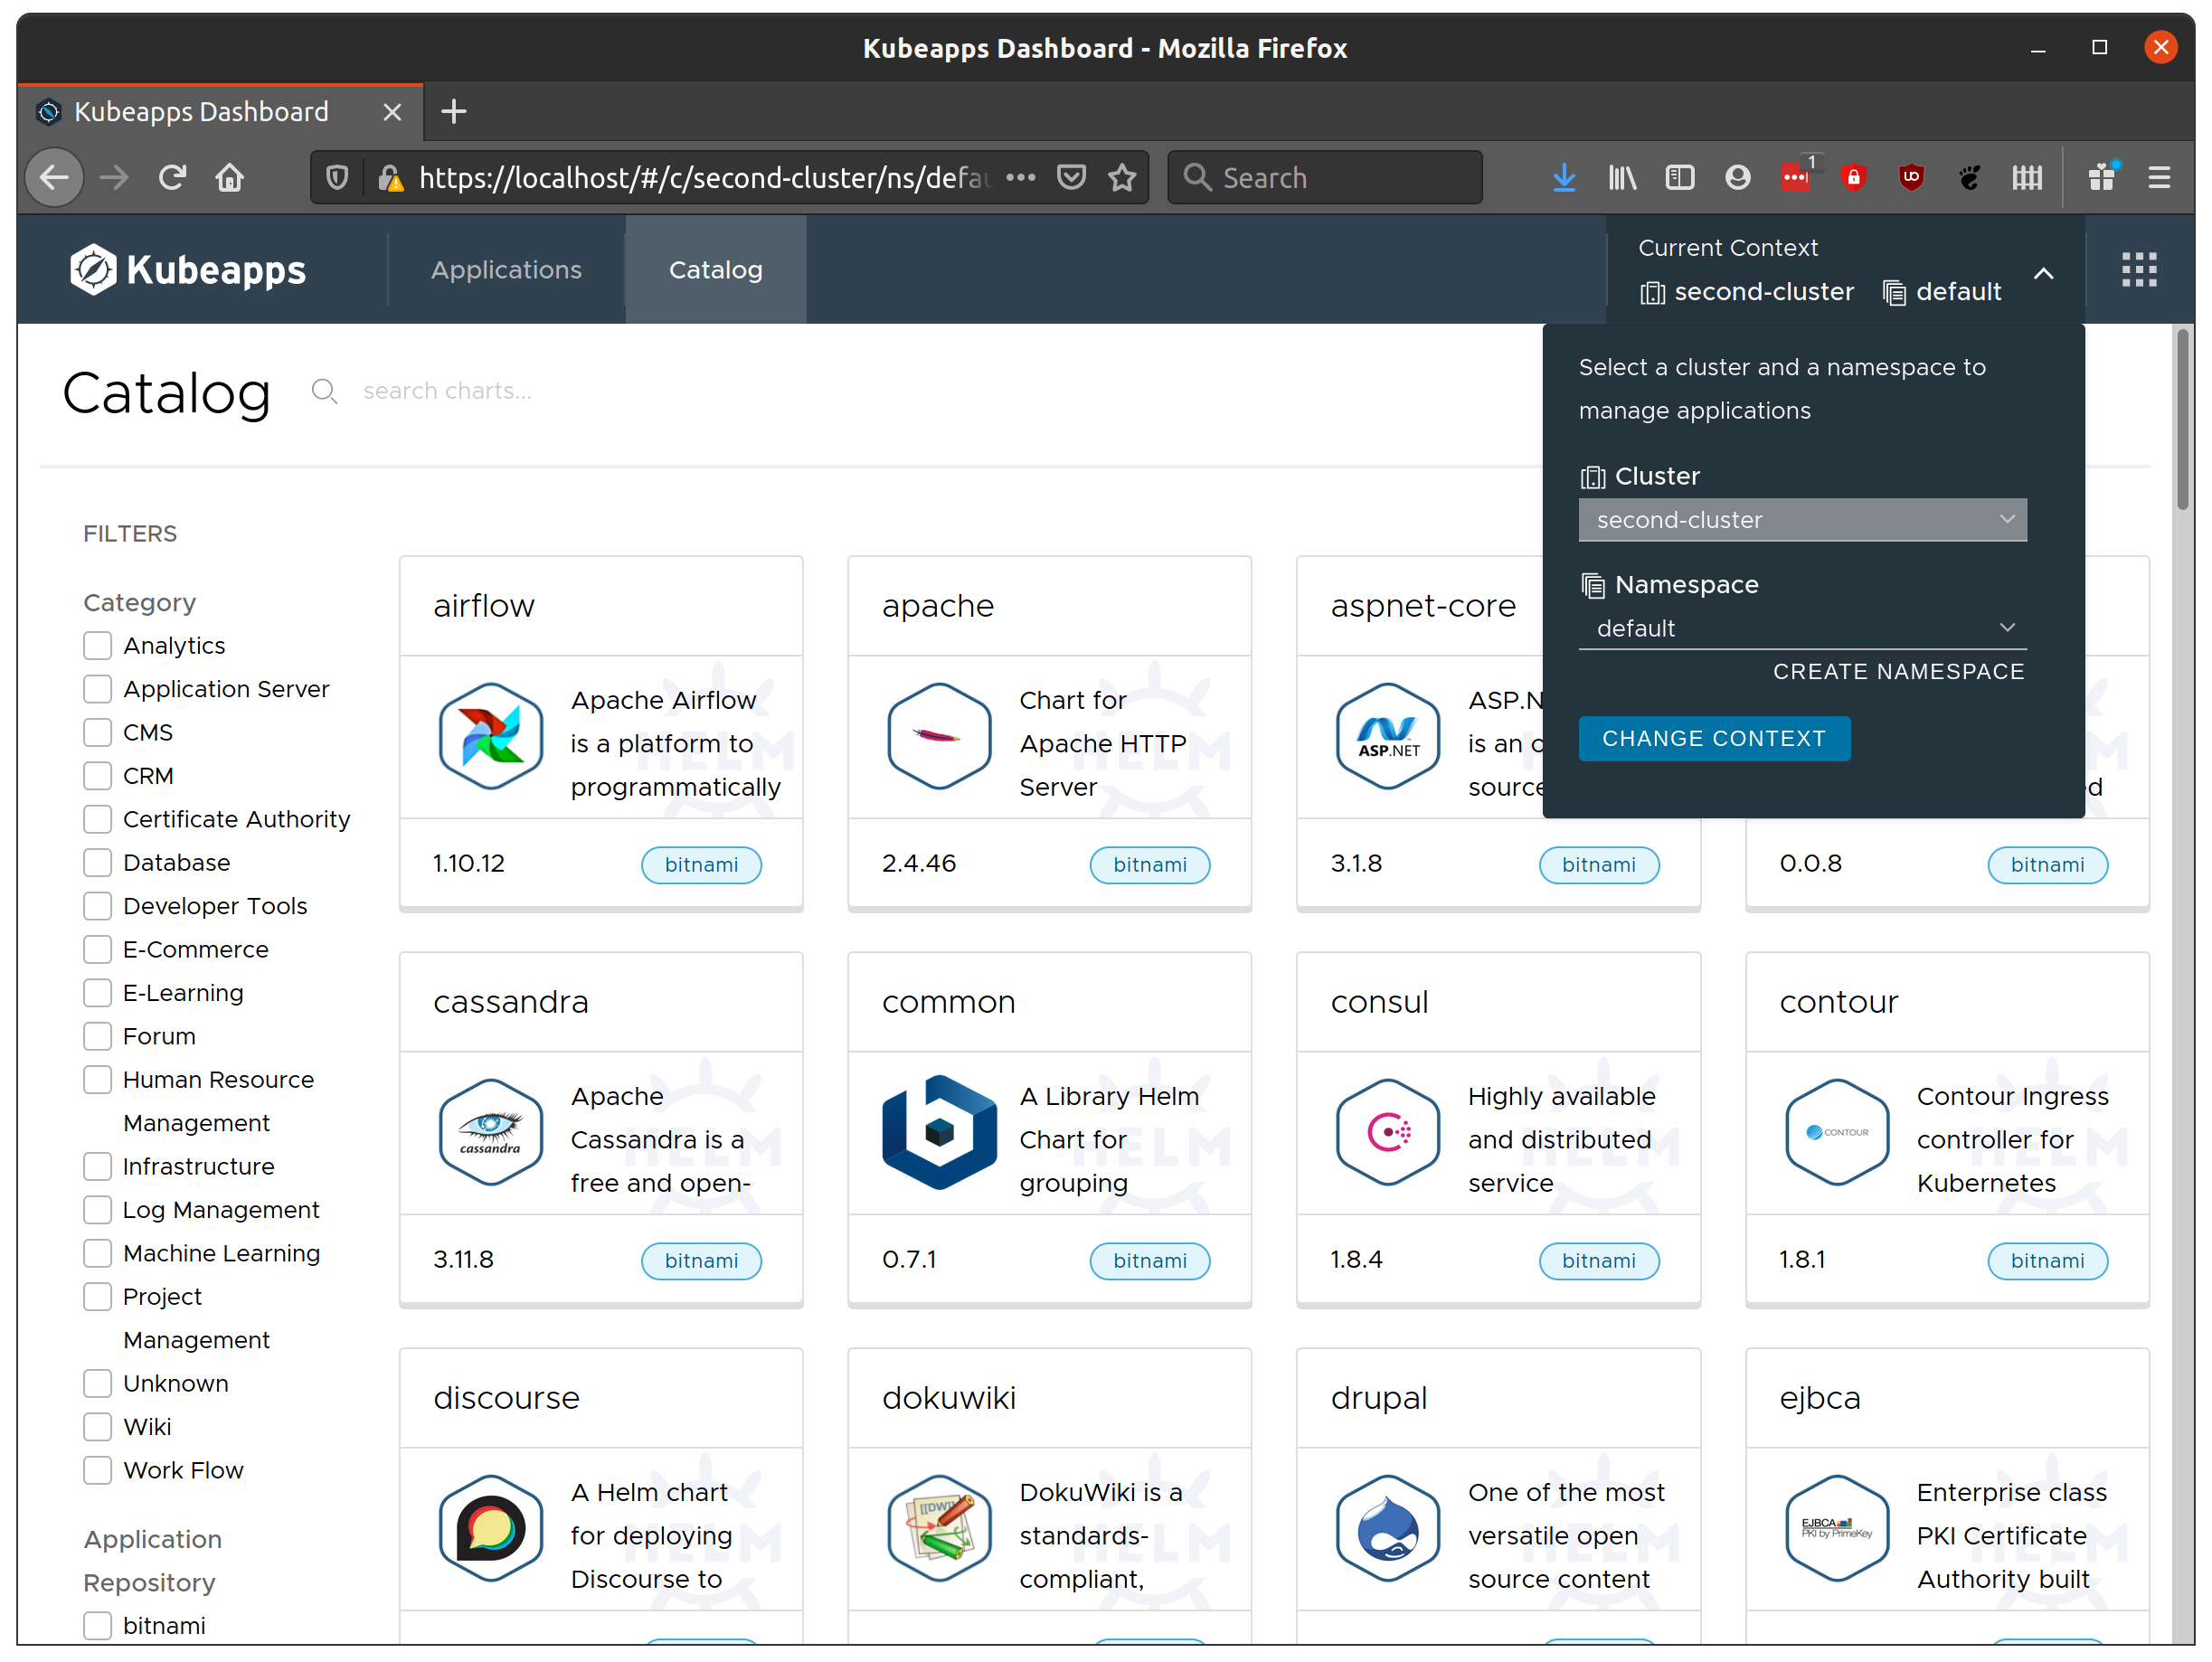
If everything works as expected then our TKG environment is now correctly configured with Dex on the management cluster as the Identity Provider trusted by the workload clusters, and we’re ready to install Kubeapps on the management cluster!
Create a second oidc-enabled cluster
Before we start with the Kubeapps installation, let’s create a second OIDC-enabled workload cluster, which is now a one-liner, with:
tkg create cluster my-second-cluster --plan=oidc
The only thing to be careful of here is that you’re running this command in the same shell where you created the first workload cluster. Follow the steps on that page to get the admin credentials, but there’s no need to followup with the other tasks (we don’t need cert-manager, nor do we need Gangway installed on the cluster - we know the OIDC configuration is correct now).
We’ll re-edit the Dex configuration later with a static client for this second workload cluster.
Now onto the Kubeapps multicluster installation and configuration!